Home assistant temporary scenes based on area_id
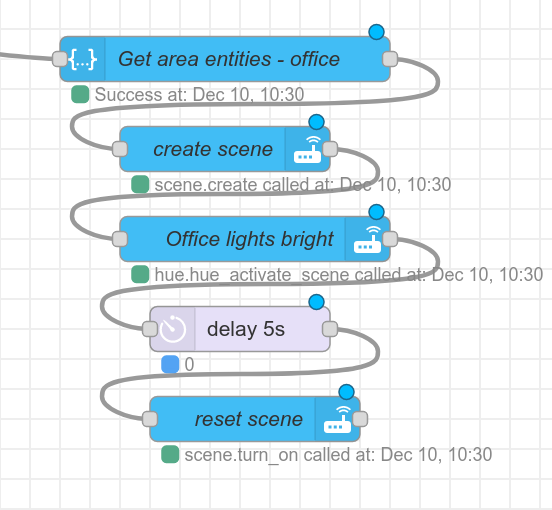
When using lights in automations to inform the users (e.g., using light.turn_on with the flash property), you’ll want to reset the lights to their previous state after the automation is completed. In case of Hue lights it doesn’t seem to work to expand() the automatically-added light groups. What I’ve opted for instead, is to retrieve the entity_ids from an area and use this as input for scene.create (which requires, of course, that you assign each of the Hue lights to an area inside Home Assistant, which I find this an acceptable trade-off).
Since I use Node-RED for my automations, I do the following:
- Template node, containing:
{% for entity in expand(area_entities('<NAME_OF_YOUR_AREA>')) | selectattr('entity_id', 'match', 'light.*') %}

{{ entity.entity_id }}{%- if not loop.last %}, {% endif -%}

{% endfor %}
(You can let it output to the payload field or another field of your choosing.) - Service call node, calling
scene.createwith data{ "scene_id": "before", "snapshot_entities": $.payload } - <your light operations, such as
hue.hue_activate_scene, flashing lights, etc.> - Service call node, calling
scene.turn_onwith data{ "entity_id": "scene.before" }